Photographing wildlife is thrilling, but it can also be challenging to get sharp, well-exposed shots. The right camera settings make a huge difference, especially when animals are moving or the lighting is tricky.
In this guide, we’ll cover the best camera settings for photographing wildlife – focusing on beginner-friendly tips (with a few advanced nuggets) and keeping in mind the needs of compact superzoom cameras.
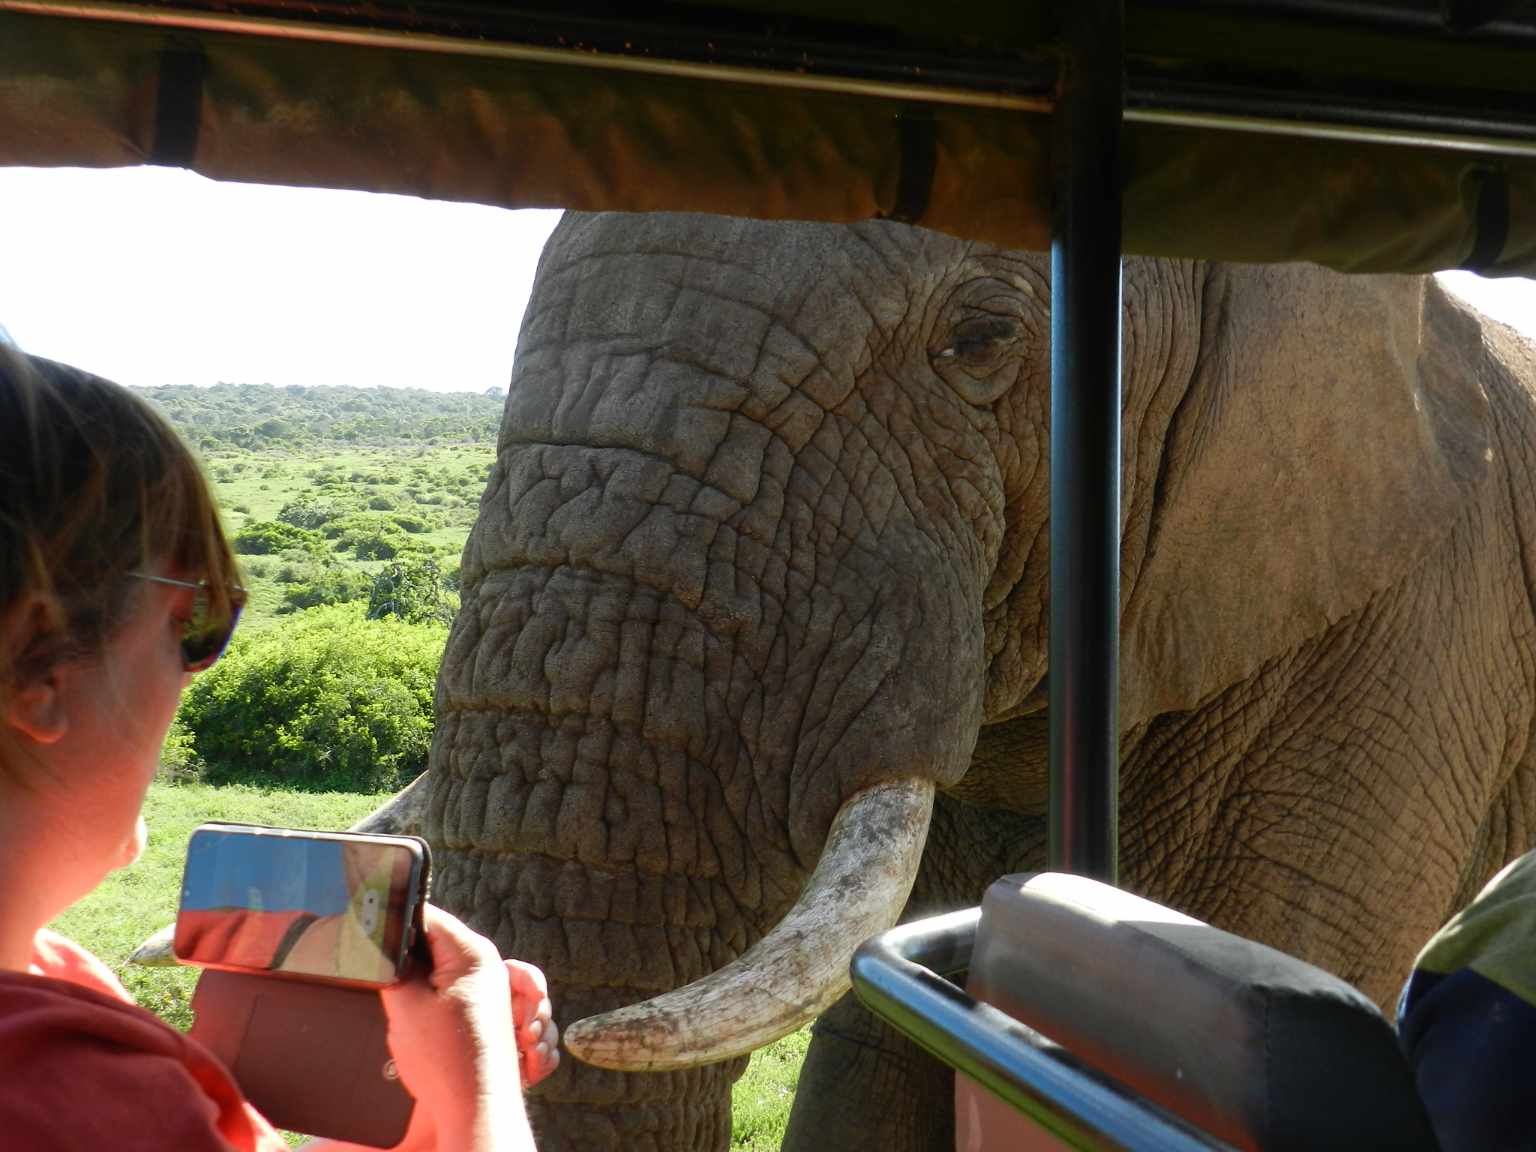
(During my own South Africa safari, I relied on a Nikon COOLPIX P950 – a bridge camera with an 83× zoom that has everything a novice wildlife photographer would want. Here’s my full review.)
Understanding Key Settings: Shutter Speed, Aperture, and ISO
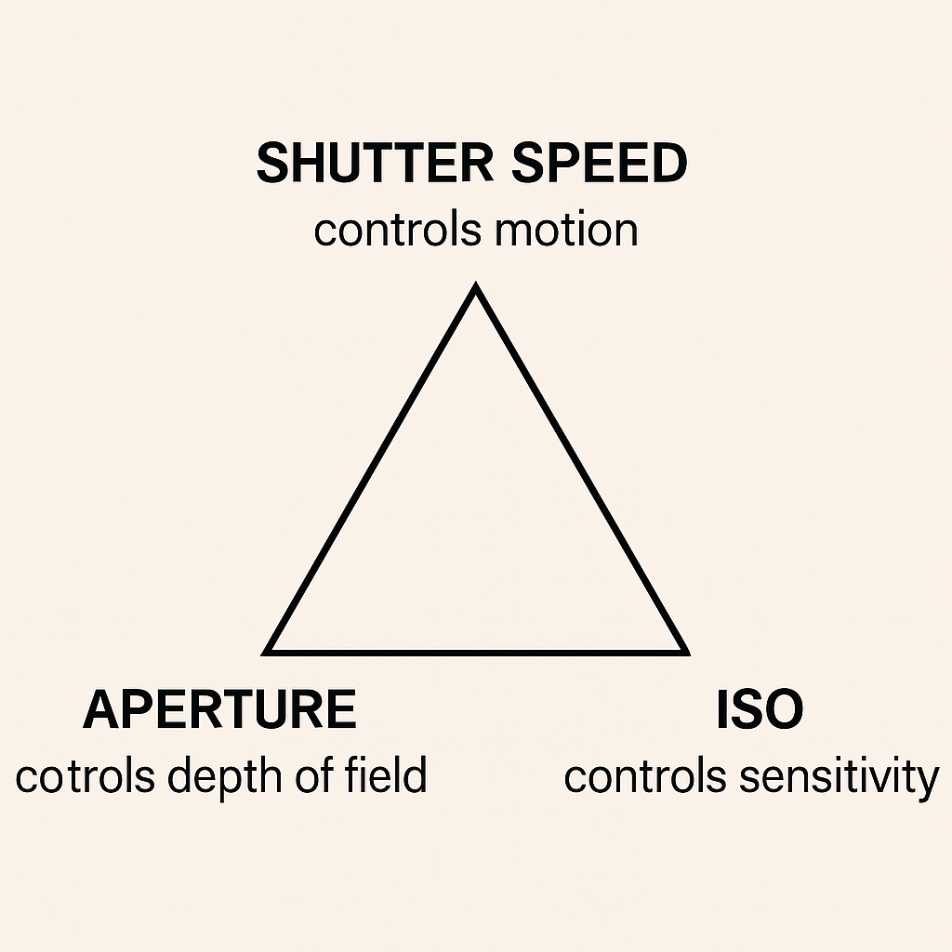
Wildlife photography often comes down to balancing three core settings (the “exposure triangle”) for a sharp and vibrant image: Shutter Speed, Aperture, and ISO. Here’s what each does and how to prioritize them:
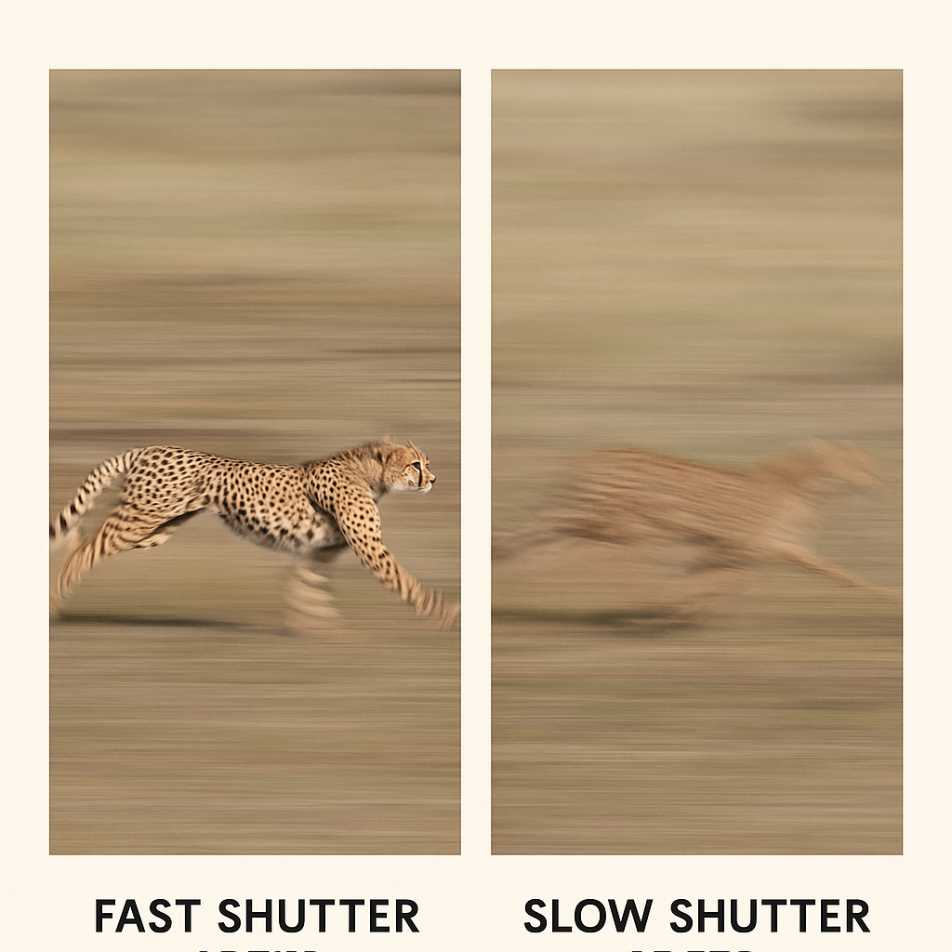
Shutter Speed – Freezing Action: A fast shutter speed is critical to freeze moving animals. As a rule of thumb, err on the side of faster speeds – motion blur can ruin a shot, whereas noise from high ISO can be reduced later.
Some recommended minimum shutter speeds: ~1/500s for large animals walking, ~1/1000s or faster for running animals, and 1/2000–1/4000s for birds in flight.
In low light, you might use a slightly slower speed if the subject is still, but if there’s any movement, raise your ISO and keep that shutter speed up.
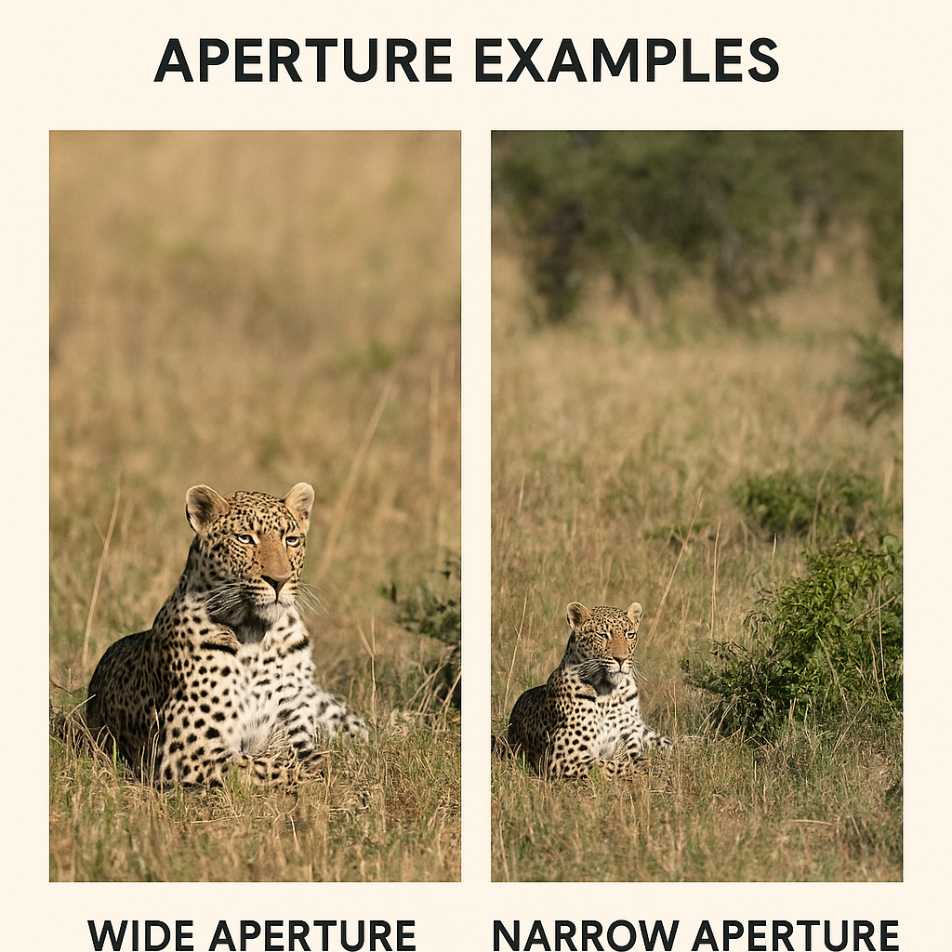
Aperture – Depth of Field vs. Light: Aperture (f-stop number) controls the lens opening. A wider aperture (low f-number like f/2.8 – f/5.6) lets in more light and gives a shallow depth of field.
In low light or dense forests, shoot wide open. In bright daylight, you can stop down slightly for more depth of field if needed. On superzoom compact cameras like the P950, the aperture narrows as you zoom – just use the widest available aperture at your zoom level.
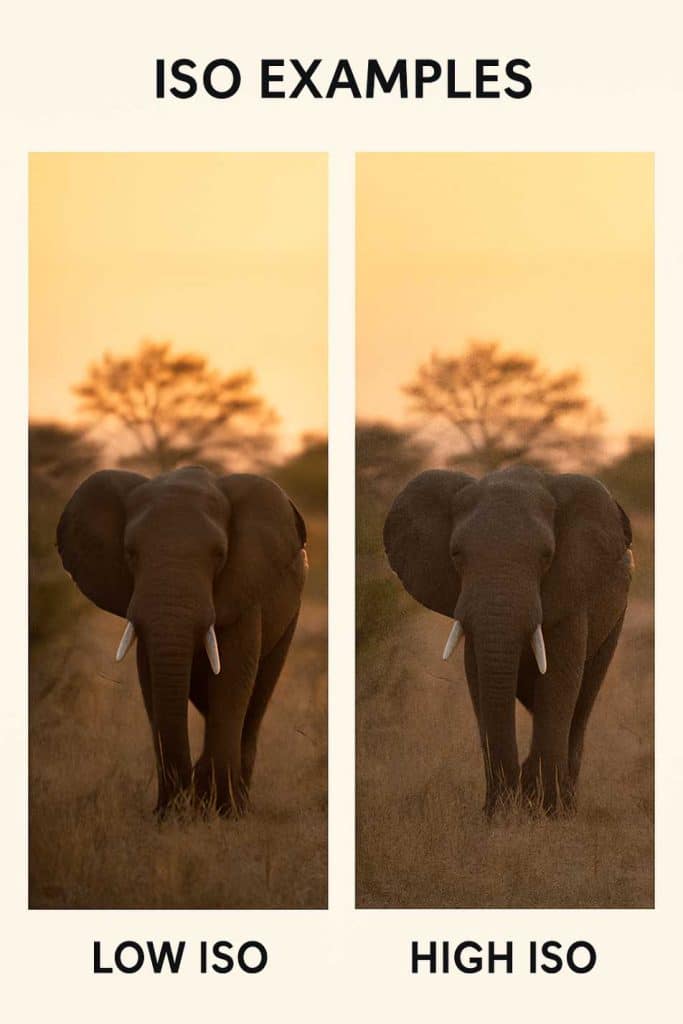
ISO – Balancing Noise and Brightness: ISO controls the sensor’s sensitivity to light. Low ISO (e.g. 100) gives the cleanest image, but high ISO (e.g. 800, 1600+) brightens exposure at the cost of added noise.
During wildlife shoots, prioritize shutter speed and aperture – a bit of noise is better than blur. Don’t be afraid to push ISO higher in dawn, dusk, or forest scenes. Auto ISO is a great feature to explore for balancing exposure without sacrificing shutter speed.
Choosing a Shooting Mode (Auto vs. P/A/S/M)
Your camera’s shooting mode affects how much control you have:
Auto or Scene Modes: Great for beginners. Use “Sports,” “Wildlife,” or “Bird-Watching” modes for fast shutter speeds and continuous AF. These modes limit adjustments but prioritize action shots.
Program Mode (P): Offers flexibility to adjust ISO and exposure compensation. Good middle ground.
Aperture Priority (A): You set the aperture, and the camera handles the shutter. Use when depth of field control is key.
Shutter Priority (S): You choose the shutter speed; the camera sets aperture. Great for ensuring motion freeze.
Manual (M): Full control. Try combining this with Auto ISO for a pro-level balance between consistency and adaptability.
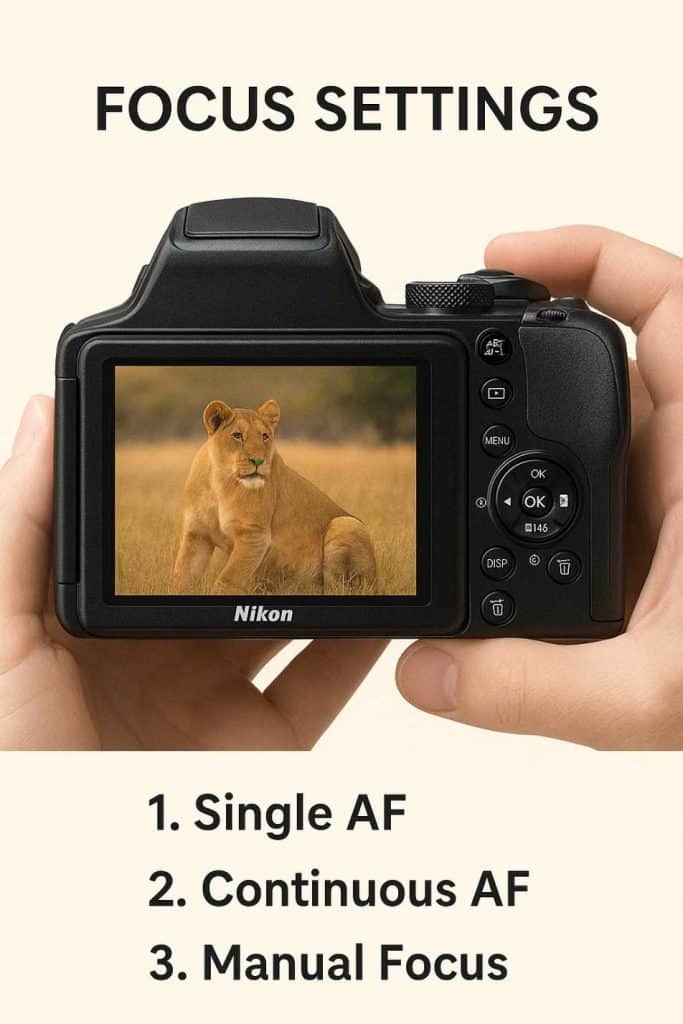
Focus Settings for Wildlife (Autofocus Modes & Areas)
Autofocus Mode: Use AF-C (continuous autofocus) for moving subjects. Use AF-S (single-shot) for still animals. Avoid letting the camera auto-decide.
AF Area Mode: Choose single-point AF to control exactly where the camera focuses – usually on the eye. Avoid full auto-area unless the background is clean and distant.
Manual Focus (Advanced): Use if autofocus fails due to branches or low contrast. Focus peaking (if your camera has it) helps here.
Burst Mode: Always shoot wildlife in continuous shooting mode. Hold down the shutter to get multiple frames; choose the sharpest or best pose later.
Dealing with Different Lighting Conditions
Early Morning & Late Evening
Use wide apertures and high ISO to keep shutter speed fast enough.
Adjust exposure compensation if needed (e.g., +1 EV to brighten a backlit subject).
RAW format helps with white balance and recovering details later.
Bright Midday Sun
Lower ISO and faster shutter speeds are easy here.
Beware of harsh shadows and blown highlights. Use exposure compensation or spot metering on the subject.
Polarizing filters help in extreme glare but aren’t ideal in low light.
Forest & Jungle
Light is dim and patchy. Use high ISO, wide aperture, and spot or center-weighted metering.
Expect slow shutter speeds – brace yourself or use stabilization.
Desert/Savannah vs. Forest: Quick Settings Comparison
Setting
Desert/Savannah
Forest/Jungle
ISO
100–200 (daylight)
800–3200+ (low light)
Shutter Speed
1/1000s+ easy to achieve
1/500s goal; may dip lower
Aperture
Stop down if needed
Always shoot wide open
Focus Area
Single-point or tracking
Single-point (avoid foreground)
Metering
Evaluative or center-weighted
Spot or center-weighted
White Balance
Daylight/Auto
Auto or Shade preset
Advanced Tips
Use Exposure Compensation: Quickly adjust brightness without switching modes.
Shoot in RAW: Better editing flexibility, especially for exposure and white balance.
Know Your Shortcuts: Customize buttons for ISO, AF modes, and metering.
Back-Button Focus: Try this once you’re comfortable with focus techniques.
Stay Patient: Anticipating animal behavior often matters more than gear.
Conclusion
Getting the best camera settings for wildlife is all about balancing light, motion, and composition. Prioritize shutter speed to freeze action, use wide apertures for light and blur, and don’t fear high ISO to keep shots sharp. Compact cameras like the Nikon P950 are incredibly capable with the right setup.
Who am I? Well, the least you can say is that I am quite crazy about Africa, its nature, its climate, its culture, and more.
As a young woman in my twenties, I had already traveled to several African countries by traveling along in an overlander on my own and mostly camping ( or glamping ) and just fell in love with the diversity of it all.
So much, so that at the age of 26, I went back to university to study biology, which, unfortunately, I couldn’t finish because of health reasons (yes, I got sick from a tropical disease, oh cynicism). But this did not stop my dream of traveling back to Africa several times, and I still do.
My dream was back then to leave Europe and go study animal behavior, especially the elephants (sure, that’s every girl’s dream haha), but I am also very much intrigued by hyenas and other “ugly African animals“.
So, I “kind of” have a little bit of a scientific approach to my articles, when I write about African birds, for example. And most of all: the passion.
But life goes on, you move from one side of the country to the other, you get sick again and top it off with lower back problems, and before you know it, you are over 50 hahaha!
Now, I still travel to Africa, but take it a bit “easier” than the good old camping days, and stay in comfortable, yet affordable accommodations, together with my husband Wouter.
These are some of the countries I have traveled to: Kenya, Tanzania, Zanzibar, Malawi, Zambia, Zimbabwe, South Africa, Namibia, Botswana, Tunisia, and a little bit of Lesotho LOL .
While clearly not being African territory, but Spanish, I also visited Gran Canaria and Tenerife, and location-wise, I consider them “African”, because of their climate and nature, sue me :-p
The last trip I took was to South Africa in the year 2023, and it sure got the fevers for Africa back! From the Barberton mountains to the Drakensberg and the Southcoast, one month wasn’t enough at all to see the whole country, so we’ll be back! At ease and with a little bit more luxury than in my younger days haha!